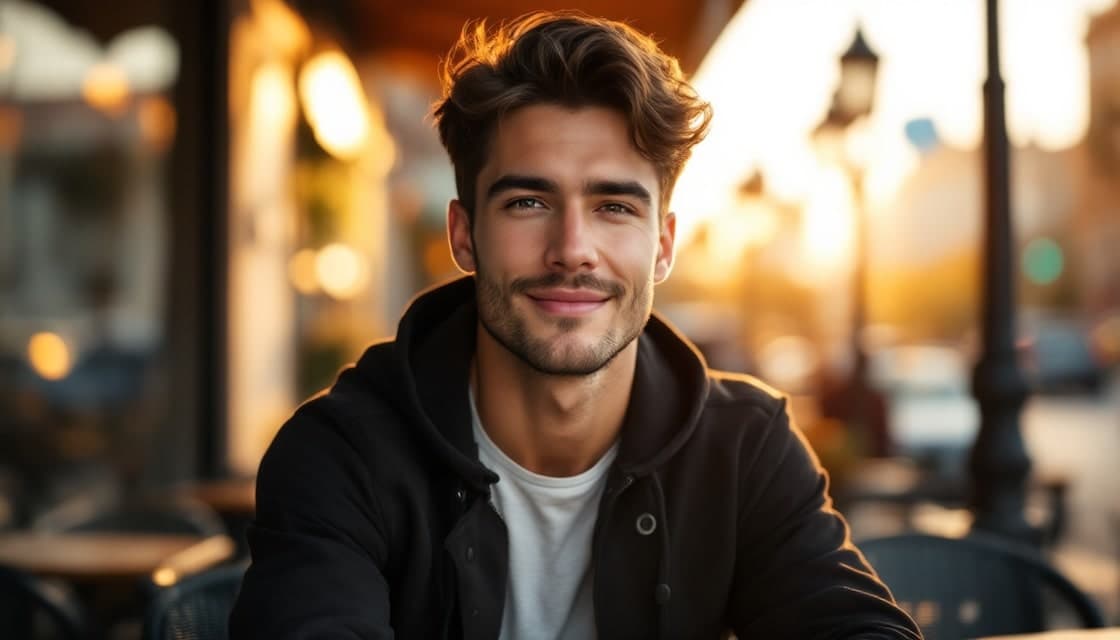
Embarking on the journey to craft the perfect dating profile picture by yourself can be daunting. Yet, the power of a well-taken photo can radically transform your online dating experience. Did you know that profiles with high-quality photos receive significantly more likes and messages?
Indeed, a recent study highlighted that profiles featuring well-composed, high-resolution images are 27% more likely to catch a potential match's eye. Whether you're looking to impress on Tinder, Bumble, or any other platform, mastering the art of taking pictures by yourself is not just a skill but a game-changer.
Your dating photos determine your success before you even send that first message. The difference between getting ignored and sparking genuine interest often comes down to the quality and appeal of your self-taken photos. This isn't about being photogenic - it's about understanding the system and optimizing every element to maximize your results.
Profiles with high-quality photos receive up to 33% more messages and 21% more likes than those with lower-quality images.
In this comprehensive guide, we will walk through essential techniques and insider tips to help you capture stunning, conversation-starting pictures all by yourself. From mastering professional-level lighting setups to understanding platform-specific photo strategies, this article is your complete optimization toolkit for DIY dating photography.
The Strategic Advantage of DIY Dating Photography
Most guys think taking their own dating photos is a last resort, something you do when you can't get a friend to help. This is the wrong mindset. Taking your own pictures isn't a disadvantage. It's a powerful strategic move that gives you a competitive edge. Why? Because it puts you in 100% control of every variable.
Think of it like A/B testing a landing page. When you're the photographer, you can systematically test and optimize every element to find what gets the best results:
- Total Control Over Expression: You can take dozens of shots to capture that perfect, natural smile without feeling rushed or judged by a friend.
- Mastery of Angles: You can experiment endlessly to find the angles that best define your jawline and highlight your best features.
- Perfect Lighting Conditions: You're not limited to a friend's schedule. You can shoot during the "golden hour" every single day if you want, ensuring ideal lighting.
- Unlimited Iterations: You can test different outfits, backgrounds, and poses without exhausting someone else's patience. This allows you to build a complete, strategic photo lineup that tells a compelling story.
Framing DIY photography this way shifts it from a chore into an optimization process. You're not just taking pictures. You're engineering a high-performing dating profile from the ground up.
Essential Equipment for Taking Dating Pictures by Yourself
Building your solo photography setup doesn't require expensive gear, but the right tools will dramatically improve your results. Think of this as investing in equipment that pays dividends through better matches and more engaging conversations.
Camera Selection and Settings
Your smartphone is likely more powerful than you realize. Modern phones can produce photos that rival professional cameras when used correctly:
- Use your phone's back camera: The rear camera typically has higher resolution and better image processing than the front-facing camera
- Enable grid lines: This helps you apply the rule of thirds for better composition
- Set to highest resolution: Always shoot at your phone's maximum quality setting
- Use portrait mode: This creates natural background blur that makes you stand out
- Avoid digital zoom: Move physically closer instead of zooming to maintain image quality
For DSLR users, shoot in aperture priority mode (A/Av) with an aperture of f/2.8-f/4 for natural background separation.
Tripod and Remote Setup
A sturdy tripod is your most important investment for consistent, high-quality shots:
- Smartphone tripods: Look for adjustable height (minimum 4-6 feet) with a secure phone mount
- DSLR tripods: Invest in one that can support your camera's weight plus any lens
- Remote shutter options: Use your phone's timer (10-second delay), a Bluetooth remote, or voice commands
- Multiple angle capability: Choose a tripod that allows easy height and angle adjustments
The key is stability. Even the slightest camera shake can ruin an otherwise perfect shot, especially in lower light conditions.
Lighting Equipment for Home Shoots
While natural light is ideal, having backup lighting options gives you flexibility:
- Ring lights: 18-inch diameter provides even, flattering light for close-up shots
- Softbox lights: Create professional studio-quality lighting that mimics natural light
- Reflectors: White posterboard or professional reflectors can bounce light to fill shadows
- LED panels: Adjustable color temperature lights that work well for video calls too
Position lights at 45-degree angles to avoid harsh shadows, and always have your main light source slightly above eye level.
Look your best on every dating app. In 10 minutes our AI generates realistic and high-performing dating photos designed to get more likes and dates.
- Get a profile you're proud of
- Drastically increase your matches
- Turn great matches into more dates
Mastering Lighting for Professional-Quality Results
Lighting makes or breaks your photos. Understanding how to control and manipulate light will instantly elevate your dating photos from amateur to professional-quality results.
Natural Light Optimization
Natural light produces the most flattering, authentic-looking photos:
- Golden hour magic: Shoot within one hour of sunrise or sunset for warm, soft lighting
- Overcast advantage: Cloudy days create perfect natural softbox lighting - no harsh shadows
- Window light techniques: Position yourself at a 45-degree angle to a large window for dimensional lighting
- Avoid harsh midday sun: Direct sunlight creates unflattering shadows and causes squinting
Direction matters: Front lighting is safe but can appear flat. Side lighting creates depth and dimension. Backlighting (with you between the camera and light source) can create beautiful rim lighting effects.
Artificial Lighting Setup
When natural light isn't available, create your own professional lighting setup:
- Three-point lighting: Key light (main), fill light (soften shadows), rim light (separation from background)
- Light positioning: Main light should be 30-45 degrees above eye level and slightly to one side
- Color temperature: Use daylight-balanced lights (5500K) for the most natural appearance
- Avoid mixed lighting: Don't combine warm indoor lights with cool daylight - pick one color temperature
Common Lighting Mistakes to Avoid:
- Shooting directly under overhead lights (creates raccoon eyes)
- Using on-camera flash (creates harsh, unflattering light)
- Mixing different color temperatures in the same shot
- Positioning lights too low (creates spooky upward shadows)
Camera Settings and Technical Fundamentals
Understanding your camera's technical capabilities allows you to capture consistently sharp, well-exposed photos that stand out on dating apps.
Timer and Self-Portrait Modes
Maximize your self-timer effectiveness:
- 10-second delay: Gives you time to get in position and relax into a natural pose
- Burst mode: Take multiple shots in sequence to capture the perfect expression
- Voice activation: Many phones allow voice commands like "cheese" or "smile" to trigger the shutter
- Interval timer: Some apps allow continuous shots at set intervals for multiple pose options
Focus and Exposure Control
Sharp, properly exposed photos are non-negotiable:
- Tap to focus: Always tap your face on the screen to ensure sharp focus on your eyes
- Exposure compensation: Adjust brightness by tapping and sliding the exposure bar
- Face detection: Enable face detection to ensure optimal exposure for skin tones
- HDR mode: Use for high contrast situations but avoid the over-processed look
Composition Guidelines
Apply these rules for visually appealing photos:
- Rule of thirds: Place your eyes on the upper third line for better composition
- Fill the frame: Your head and shoulders should take up about 1/3 of the photo
- Leave breathing room: Don't crop too tightly - give yourself some space
- Eye level or slightly above: Camera should be at or slightly above eye level for most flattering angle
How to Look Natural and Confident When No One's Watching
Great posing separates amateur selfies from photos that generate serious interest. The biggest challenge when shooting alone is overcoming the awkwardness and looking genuinely relaxed. The goal is to look natural and confident while optimizing your most attractive features.
Before you even start shooting, set the mood. Put on a music playlist that makes you feel confident and energetic. Do a quick workout to get your blood flowing and release any tension. The energy you feel behind the camera will translate into the final photo. Mastering this is key to figuring out how to look more attractive in pictures.
Natural Expressions and Poses
Authentic expressions create connection:
- The genuine smile technique: Think of something that actually makes you happy before clicking. A forced smile is easy to spot and signals low confidence. The goal is to trigger a real emotion.
- The slight lean: Lean slightly toward the camera to show engagement and confidence. It's a subtle, non-verbal cue that you're interested and open.
- Asymmetrical positioning: Turn your body slightly away from camera while keeping your eyes toward the lens. This creates a more dynamic and flattering silhouette.
- The conversation pose: Look as if you're about to speak to someone just off-camera. This creates a candid, engaging feel that draws the viewer in.
Hand and body positioning:
- Keep shoulders back and down for confident posture
- If hands are visible, keep them relaxed and natural
- Avoid crossed arms (can appear defensive)
- Use gentle hand gestures that complement your expression
Angle Optimization
Find your most flattering angles through systematic testing:
- The 45-degree rule: Most people look best when turned 10-45 degrees from straight-on
- Jaw definition: Slightly push your chin forward and down to define your jawline
- Eye contact variations: Direct eye contact shows confidence. Looking slightly off-camera can appear more candid.
- Profile considerations: If you have a strong profile, don't be afraid to show it
Full Body vs. Headshot Considerations
Different shot types serve different purposes:
- Headshots: Perfect for showing facial expressions and creating intimacy
- Full body shots: Demonstrate your physique and style choices
- Three-quarter shots: Show upper body while maintaining facial focus
- Environmental shots: Include some context about your lifestyle or interests
Creative Locations & Scenarios for Solo Photoshoots
Knowing the technical skills is half the battle. Now you need to apply them in locations that tell a story about who you are. The goal is to create photos that look like candid moments from an interesting life, not a staged photoshoot in your bedroom.
At-Home Scenarios That Showcase Personality
You don't need to leave your house to take great dating pictures. Use your space to hint at your hobbies and lifestyle.
- The Casual Intellectual: Sit near a large window with good natural light, holding a book or a cup of coffee. Look thoughtfully out the window or down at the book.
- The Focused Hobbyist: If you play an instrument, cook, or paint, set up a shot of you engaged in that activity. This is a powerful way to show, not just tell, what you're passionate about.
- The Relaxed Professional: If you have a clean, well-lit home office space, take a shot of you working on a laptop, looking relaxed and competent.

Easy Outdoor Locations for Dynamic Shots
Getting outside adds energy and context to your photos. You don't need epic landscapes, just simple, clean backgrounds.
- The Urban Explorer: Find a brick wall, a clean-looking mural, or an interesting architectural feature downtown. Use it as a textured backdrop.
- The Coffee Shop Regular: Set your tripod up on a table at a cafe with outdoor seating. Pose with a coffee and look off-camera as if you're waiting for a friend.
- The Park Relaxer: Find a park bench on a sunny day. Take shots of you leaning back casually, reading, or just enjoying the day. This communicates a relaxed and easy-going vibe.
These scenarios are just starting points. The key is to choose environments that align with your actual personality and use them to create compelling, story-driven images based on data-backed photo strategies.
Platform-Specific Photo Strategies
Each dating platform has its own culture and algorithm preferences. Optimizing your photos for specific platforms dramatically improves your success rate.
Tinder Photo Optimization
Tinder's swipe-based system demands immediate visual impact:
- First photo rules: Your primary photo should be a clear headshot with a genuine smile
- Color psychology: Bright colors (especially red) tend to perform better than muted tones
- Background simplicity: Keep backgrounds clean and uncluttered to maintain focus on you
- Activity shots: Include photos of you doing interesting activities to spark conversation
Tinder's algorithm favors:
- High-resolution images
- Photos with good lighting
- Images that clearly show your face
- Authentic expressions over overly posed shots
For more Tinder-specific strategies, check out our guide on how to get more matches on Tinder.
Bumble-Specific Strategies
Since women make the first move on Bumble, your photos need to inspire conversation:
- Approachability factor: Warm, friendly expressions work better than intense or overly serious looks
- Lifestyle storytelling: Show yourself in various contexts to give conversation starters
- Quality over quantity: Bumble tends to favor fewer, higher-quality photos
- Authenticity emphasis: Natural, unfiltered photos typically perform better
Bumble preferences:
- Outdoor photos with natural lighting
- Photos that show your personality
- Clear, unobstructed face shots
- Images that suggest shared interests or values
Learn more about Bumble's photo requirements in our Bumble photo guidelines article.
Hinge Photo Strategy
Hinge's prompt system allows for more creative photo storytelling:
- Conversation starters: Choose photos that naturally lead to questions or comments
- Variety is key: Show different aspects of your personality across your photo set
- Prompt integration: Make sure your photos complement your written prompts
- Authentic moments: Candid shots often outperform obviously posed photos
Creating Photo Variety for Your Complete Profile
A strong dating profile tells a complete story through diverse, high-quality images. Each photo should serve a specific purpose in showcasing different aspects of your personality and lifestyle.
The Essential Photo Types
Build your profile with these core photo categories:
- Primary headshot: Clear, well-lit face photo with genuine smile
- Full body shot: Shows your physique and style in flattering lighting
- Activity photo: You engaged in a hobby or interest (guitar, hiking, cooking)
- Social proof photo: You with friends (but make it clear which person you are)
- Travel/adventure photo: Shows you're interesting and well-traveled
- Professional photo: Demonstrates ambition and success
Storytelling Through Photo Selection
Your photo set should answer these questions:
- What do you look like? (clear face shots)
- What's your lifestyle like? (activity and environment shots)
- Are you sociable? (group photos, but not too many)
- What are you passionate about? (hobby and interest photos)
- Where do you go? (location and travel photos)
Photo Order Strategy
The sequence matters on most platforms:
- Primary photo: Your absolute best, clearest face shot
- Full body shot: Shows your complete appearance
- Activity/interest photo: Demonstrates personality
- Social photo: Proves you have friends and social skills
- Additional photos: Fill gaps in your story or showcase other interests
For comprehensive guidance on photo selection, explore our dating profile pictures resource.
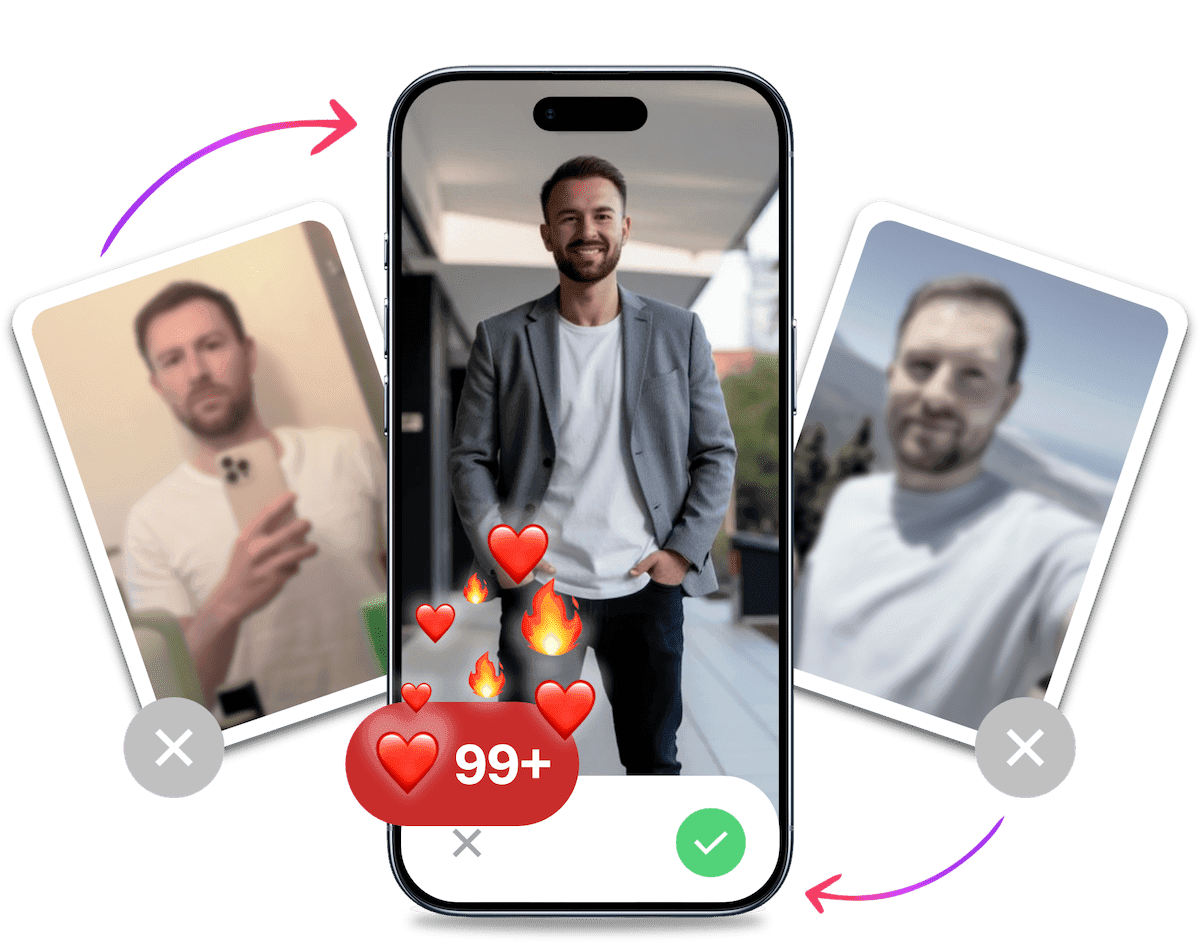
It's Probably Your Photos.


Average users see 8x more right swipes with our AI photos. Stop wasting time on dating apps and join 50,000+ singles who have already found better dates with TinderProfile.ai.
Advanced DIY Photography Techniques
Once you've mastered the basics, these advanced techniques will set your photos apart from typical dating app selfies.
Composition and Framing Mastery
Professional photographers use these techniques to create visually compelling images:
- Leading lines: Use architectural elements or natural lines to draw attention to you
- Framing: Position yourself within natural frames like doorways or tree branches
- Depth of field: Use portrait mode or wide aperture to blur backgrounds naturally
- Negative space: Don't fill every inch of the frame - give your photos room to breathe
Advanced Lighting Techniques
Create professional-looking lighting with DIY methods:
- Bounced light: Use white walls or foam boards to reflect and soften harsh light
- Gradient lighting: Position yourself where light gradually fades for dramatic effect
- Rim lighting: Place a light source behind you for a professional outline effect
- Color gels: Use colored transparent films over phone flashlights for creative effects
Self-Timer Mastery
Maximize your solo shooting efficiency:
- Multiple angle setup: Take several shots from the same position with different poses
- Burst mode sequences: Capture natural transitions between expressions
- Remote trigger apps: Use apps that respond to hand gestures or voice commands
- Interval shooting: Set up continuous shots to capture candid moments
Photo Editing and Enhancement
Great photos start with good technique, but subtle editing can elevate your images to professional standards without looking over-processed.
Essential Editing Tools
Choose editing apps that offer precise control:
- VSCO: Professional-grade filters and manual adjustments
- Lightroom Mobile: Industry-standard editing capabilities
- Snapseed: Google's free but powerful editing app
- Adobe Photoshop Express: Quick edits with professional results
Key Editing Adjustments
Focus on these fundamental adjustments:
- Exposure: Brighten or darken the overall image
- Highlights and shadows: Balance light and dark areas
- Vibrance: Enhance colors naturally (avoid oversaturation)
- Clarity/texture: Add subtle sharpness to facial features
- Color temperature: Ensure natural-looking skin tones
Editing Guidelines for Dating Photos:
- Keep edits subtle and natural-looking
- Maintain realistic skin tones and textures
- Avoid heavy filters that obscure your actual appearance
- Focus on enhancing existing good lighting rather than fixing poor photos
- Save high-quality versions to prevent compression artifacts
What Not to Edit:
- Don't dramatically alter your facial structure
- Avoid smoothing skin to an unrealistic degree
- Don't change your eye color or add dramatic effects
- Resist the urge to make major body modifications
Common Mistakes to Avoid When Taking Dating Pictures
Understanding what not to do is just as important as knowing the right techniques. These common mistakes can instantly make your photos less appealing to potential matches.
Technical Mistakes
Avoid these technical errors that mark you as an amateur:
- Poor image quality: Blurry, pixelated, or low-resolution photos
- Bad lighting: Harsh shadows, underexposure, or unflattering overhead lighting
- Camera shake: Movement blur from unstable shooting positions
- Wrong orientation: Sideways or upside-down photos show lack of attention to detail
- Dirty lens: Smudged camera lenses create hazy, unprofessional-looking images
Composition and Framing Errors
These mistakes hurt your photos' visual appeal:
- Cluttered backgrounds: Messy rooms, busy patterns, or distracting elements
- Poor framing: Cutting off parts of your head or important body parts
- Wrong camera angle: Shooting from below (creates unflattering perspective)
- Inconsistent style: Photos that look like they're from different people
- Too many selfies: Multiple obviously self-taken photos in a row
Styling and Presentation Mistakes
Your appearance and styling choices matter:
- Inappropriate outfits: Clothing that doesn't fit well or suit the setting
- Inconsistent grooming: Wildly different hair/facial hair across photos
- Distracting accessories: Sunglasses in all photos, excessive jewelry, or attention-grabbing items
- Poor posture: Slouching, crossed arms, or defensive body language
- Forced expressions: Obviously fake smiles or overly intense stares
Profile Strategy Mistakes
These errors hurt your overall profile effectiveness:
- All similar photos: Every photo from the same angle or in the same setting
- No variety: Only headshots or only full-body shots
- Outdated photos: Images that don't represent your current appearance
- Group photo confusion: Making it unclear which person you are
- Too many solo photos: No evidence of social connections or friends
From DIY to AI Enhancement: Taking Your Photos to the Next Level
Even with perfect technique, DIY photography has natural limitations. This is where AI technology like TinderProfile.ai becomes a game-changer, allowing you to transcend the constraints of self-photography.
Recognizing DIY Limitations
Understand when your self-taken photos might need enhancement:
- Location constraints: Limited to your home or immediate area
- Background options: Stuck with whatever environments you can access
- Professional quality gaps: Difficulty achieving high-end photography aesthetics
- Style limitations: Unable to access luxury or high-status settings
- Equipment restrictions: Results limited by your available gear and setup
How AI Enhancement Transforms Your Photos
TinderProfile.ai uses advanced algorithms to elevate your DIY photos:
- High-status backgrounds: Place yourself in luxury settings, exotic locations, or professional environments
- Lighting optimization: Perfect lighting and exposure that surpasses most home setups
- Style enhancement: Upgrade clothing, accessories, and overall aesthetic
- Professional quality: Achieve results that look like expensive photo shoots
- Consistency: Create a cohesive set of photos with matching professional quality
Strategic AI Integration
Use AI enhancement as the final optimization step:
- Start with the best DIY photos using techniques from this guide
- Choose images with good composition and natural expressions
- Use AI to enhance backgrounds, lighting, and overall professional appeal
- Maintain authenticity while upgrading the visual quality and status signals
The ROI of AI Enhancement
Consider AI photo enhancement as an investment in your dating success:
- Higher match rates from improved photo quality
- More engaging conversations sparked by interesting backgrounds
- Increased perceived status and lifestyle appeal
- Time saved compared to arranging professional photo shoots
Explore how AI photos dating can transform your profile from good to exceptional.
Mastering Your DIY Dating Photography Setup
Taking great dating pictures by yourself is a skill that combines technical knowledge, artistic vision, and strategic understanding of what works on dating platforms. The techniques and strategies in this guide give you everything needed to create photos that generate real results.
Remember, great dating photography isn't about being naturally photogenic - it's about understanding the system and optimizing every controllable variable. From lighting and angles to timing and equipment, you now have the knowledge to consistently create high-quality images that showcase your best self.
The difference between getting matches and being ignored often comes down to photo quality. By implementing these professional techniques and avoiding common mistakes, you're positioning yourself to succeed in the competitive world of online dating.
The goal isn't just to take better pictures - it's to take pictures that open doors to meaningful connections and conversations.
Whether you stick with pure DIY methods or enhance your best shots with AI technology, you now have the foundation to create a dating profile that truly represents your potential. The investment in learning these skills pays dividends through better matches, more engaging conversations, and ultimately, more dating success.
Essential Questions About Taking Dating Pictures by Yourself
1. What's the best time of day to take dating pictures at home?
The optimal time is during golden hour - one hour after sunrise or before sunset - when natural light is soft and warm. If shooting indoors, position yourself near large windows during these times for the most flattering natural lighting. Avoid harsh midday sun which creates unflattering shadows.
2. Should I use a selfie stick for dating profile pictures?
While selfie sticks can be useful for full-body shots, they often create an obvious "selfie" look that may appear less professional. A tripod with timer or remote shutter typically produces better results and allows for more natural-looking poses and compositions.
3. How can I make my phone photos look professional for dating apps?
Use your phone's back camera, enable grid lines for better composition, shoot in the highest resolution, clean your lens regularly, and focus on proper lighting. Position the camera at eye level or slightly above, and use portrait mode to blur backgrounds naturally.
4. What are the most common mistakes when taking dating pictures alone?
The biggest mistakes include poor lighting (especially overhead or harsh lighting), cluttered backgrounds, camera shake from unstable positioning, shooting from unflattering low angles, and using heavily filtered or over-edited photos that don't represent your actual appearance.
5. How many different types of photos should I include in my dating profile?
Include 4-6 varied photos: a clear headshot as your primary photo, at least one full-body shot, one activity/hobby photo, and one social photo with friends. Each photo should serve a different purpose in telling your complete story and showcasing various aspects of your personality.
6. Can I use ring lights or other artificial lighting for dating photos?
Yes, ring lights and LED panels can create excellent results when natural light isn't available. Position lights at 45-degree angles above eye level to avoid harsh shadows. Choose daylight-balanced lights (5500K color temperature) for the most natural appearance.
7. What camera settings work best for self-portrait photography?
For smartphones: use the back camera, highest resolution, portrait mode when available, and tap your face to focus. For DSLRs: shoot in aperture priority (A/Av) mode with f/2.8-f/4 aperture, use single-point autofocus on your eyes, and consider using a wide-angle lens for easier framing.
8. How do I avoid the "obvious selfie" look in my dating photos?
Use a tripod instead of holding the camera, position the camera at eye level or slightly above, vary your angles and distances, include some environmental context, and take multiple shots to capture natural expressions. Remote shutters or timer modes help create more authentic-looking results.